Common Causes of Shower Head Leaks
Discovering your shower head leaking can be frustrating. Knowing the common causes can help pinpoint the issue quickly.
Worn-Out O-Ring or Washer
A common reason for shower head leaks is a worn-out O-ring or washer. These small parts seal connections but can degrade over time.
Broken Diverter Valve
A broken diverter valve can cause water to leak. It’s responsible for directing water from the tap to the showerhead.
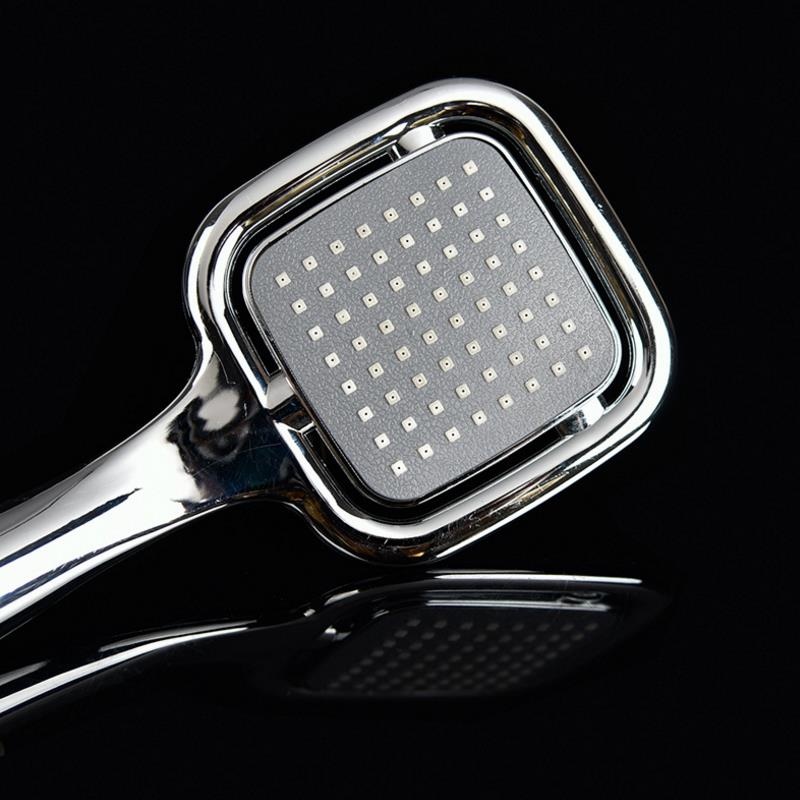
Clogged Nozzles
Water minerals can clog nozzles, creating pressure buildup. This sometimes forces water to escape from other parts of the shower head.
Loose Shower Head Connection
If the connection between the shower arm and head is loose, water may drip. Tightening it could be a quick fix.
Tools and Materials Needed for the Repair
Before you can address your shower head leaking, you need the right tools and materials. Let’s look at what you’ll need.
Teflon Tape
Teflon tape is essential for creating water-tight seals. Wrap it around the threads of the pipe to prevent future leaks.
Wrenches and Pliers
You’ll need adjustable wrenches and pliers to loosen and tighten fittings. Ensure you have these in your toolkit.
Replacement Parts (O-Ring, Washer, Valve)
Keep replacement parts handy. Purchase a new O-ring, washer, or valve in case they are the cause of the leak.
Step-by-Step Guide to Fixing a Leaky Shower Head
No one enjoys the annoyance of a shower head leaking. Taking matters into your own hands can be empowering and cost-effective. Follow this simple step-by-step guide to nip the problem in the bud.
Step 1: Turning Off the Water Supply
Always start by shutting off the water supply to your shower to avoid a wet mess. This can usually be done via the shower valve or the main water line to your home.
Step 2: Dismantling the Shower Head
Use your wrenches and pliers to carefully unscrew the shower head from the arm. Do this gently to avoid damage. Lay out all parts on a towel to keep them organized.
Step 3: Inspecting and Replacing the O-Ring or Washer
Look for signs of wear on the O-ring or washer inside the shower head. If they’re damaged, replace them with new parts to ensure a good seal.
Step 4: Cleaning or Replacing the Diverter Valve
If the diverter valve is the culprit, it may just need a good clean. Otherwise, replace it with a new one to restore proper water flow.
Step 5: Unclogging Nozzles
Remove mineral buildup from the nozzles by soaking the shower head in vinegar or using a small brush. This will help maintain water pressure and prevent leaks.
Step 6: Reassembling and Securing the Shower Head
Wrap Teflon tape around the threads of the shower arm before reattaching the shower head. Make sure it’s screwed on tightly to eliminate any dripping.
Step 7: Testing for Leaks
Turn the water supply back on and watch for leaks. If the shower head is still leaking, go through the steps again or consider calling a professional plumber.
By following these steps, you can address a shower head leaking without the need for expensive professionals. You’ll not only save money but also gain confidence in your DIY skills.
Troubleshooting Persistent Shower Head Leaks
Even after a careful repair, sometimes a shower head leaking issue persists. Here’s how you can troubleshoot further.
Checking for Pipe Issues
Inspect pipes for any signs of damage or corrosion. Look closely for small cracks or rust. Damaged pipes need replacement to stop leaks.
Evaluating the Shower Arm
Examine the shower arm for stability. If it wobbles, the thread could be worn. Use Teflon tape or replace the shower arm if necessary.
When to Call a Professional Plumber
If leaks continue despite your efforts, it’s time to call a plumber. They can diagnose hidden problems and provide expert repair.
Maintaining Your Shower Head to Prevent Future Leaks
Proper maintenance of shower head can prevent annoying leaks before they start. Implement these routine practices to ensure a well-functioning shower system.
Regular Cleaning and Descaling
Buildup from mineral deposits is a common cause for a shower head leaking. To prevent this:
- Clean your shower head regularly by soaking it in vinegar.
- Rinse thoroughly and wipe down to remove any lingering deposits.
- Repeat this process every few months to keep nozzles clear.
Inspecting and Tightening Connections Periodically
Loose connections can lead to leaks. To avoid this:
- Once every few months, check the connection between the shower head and the arm.
- Hand-tighten if loose, or use a wrench for a secure fit.
- Be cautious not to overtighten, as this may damage threads.
Replacing Parts Before They Fail
Worn parts are often the culprits of a leaky shower head. To stay ahead:
- Inspect O-rings and washers for wear annually and replace if needed.
- Keep spare parts like diverter valves on hand for quick swaps.
- Consider this maintenance part of your regular household upkeep.
By staying proactive with these maintenance tips, you minimize the risk of future leaks and extend the life of your shower head.
Advantages of Fixing Your Shower Head Yourself
Fixing your own shower head leaking issues brings several benefits. Understanding these can inspire you to tackle the fix yourself.
Saving Money on Repairs
Repairing a shower head on your own saves cash. You avoid costly plumber fees and only spend on parts.
Gaining DIY Skills and Knowledge
Fixing a leak boosts your DIY know-how. You learn about your home’s plumbing and increase your hands-on skills.
Preventing Further Damage and Water Waste
Addressing leaks promptly avoids worse damage. It also stops wasting water, helping your bills and the planet.
When to Consider a Shower Head Replacement
While fixing a leaking shower head can often be a simple DIY project, there are times when a replacement is a better option. Knowing when to replace your shower head can save time and money in the long run.
The Age of Your Shower Head
Shower heads can last for years, but they don’t last forever. If your shower head is over a decade old, it might be time to replace it. Old models can suffer from irreparable wear and tear. Also, newer shower heads may have better water efficiency and updated features.
Identifying Irreparable Damage
Inspect your shower head for damage that you can’t fix. Look for cracks, broken parts, or severe corrosion. Such damage often means a replacement is necessary to ensure a proper functioning shower.
Upgrading for Efficiency and Performance
Modern shower heads can provide better performance. They often come with water-saving technologies that reduce bills and conserve water. If you want to upgrade to a low-flow model or desire better water pressure, consider a new shower head.
Replacing an old or damaged shower head can offer a fresh start. It’s an opportunity to upgrade your shower experience while being eco-friendly. Keep in mind, when considering a replacement, make sure to choose a model that fits your shower system to ensure a smooth installation.

Conclusion: The Importance of Addressing Shower Head Leaks
A leaking shower head is a common household issue that can lead to significant water waste and other problems. Understanding the causes, how to fix the leak, and preventive measures can help maintain the integrity of your plumbing system. Regular maintenance of your shower fixtures and prompt repairs can ensure a functional and efficient home.
By taking proactive steps to address shower head leaks, homeowners can save money on water bills and protect against potential damage to their bathrooms. Whether you decide to tackle repairs yourself or seek professional assistance, acting quickly and knowledgeably is essential. After all, a little attention can go a long way in maintaining a well-functioning home.


