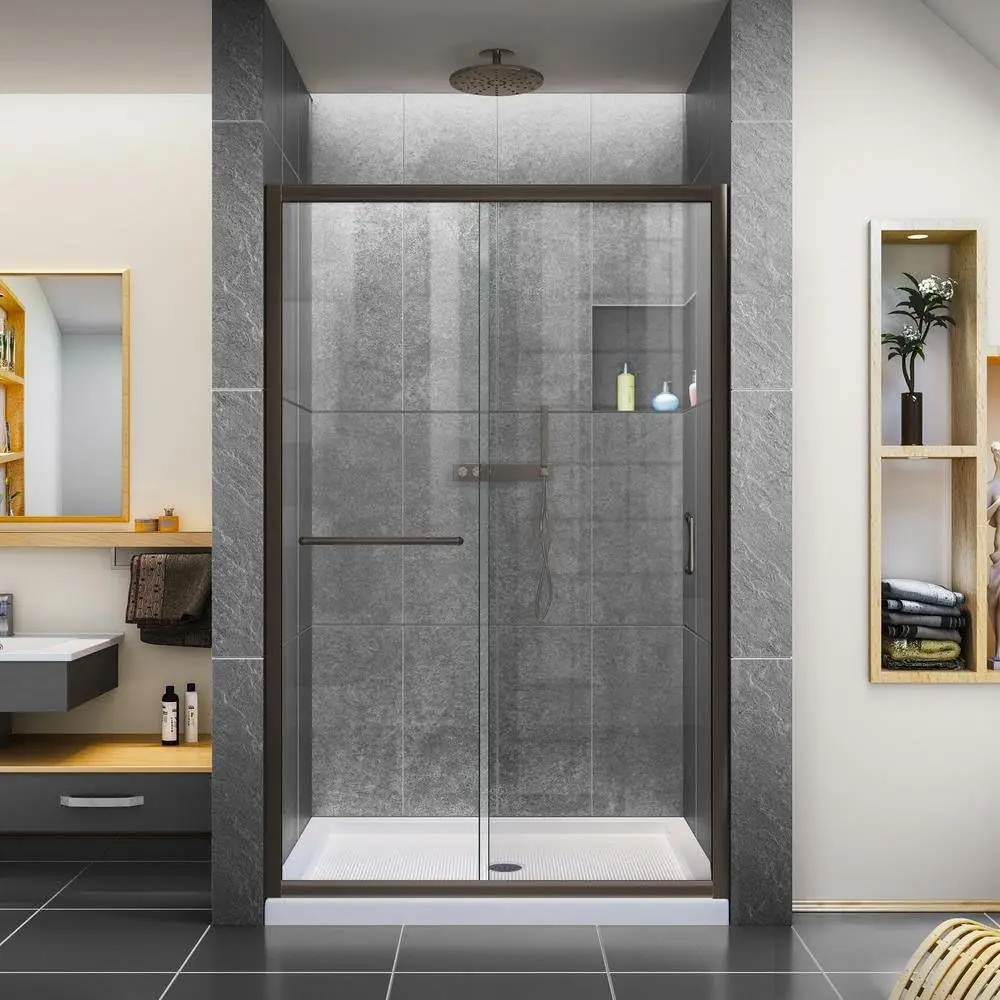
Benefits of Installing a Walk-In Shower
Walk-in showers offer multiple benefits, from accessibility improvements to contemporary aesthetics. Understanding how to build a walk in shower is crucial when considering a bathroom upgrade or new installation.

Ease of Accessibility
A prime benefit of walk-in showers is their ease of entry. Without barriers, they provide a safer shower experience, particularly for the elderly or those with mobility challenges.
Streamlined Cleaning
Walk-in showers boast smooth surfaces and minimal nooks, simplifying the cleaning process. This design reduces mold accumulation and keeps maintenance low.
Modern Appeal
Opting for a walk-in shower instantly updates a bathroom’s look. Its sleek lines and open feel contribute to a more modern and expansive ambiance.
Versatile Design Options
These showers can fit into various bathroom layouts, whether expansive or compact. The flexibility in design choice and customization is a significant draw.
Enhanced Safety
With no threshold, the risk of trips and falls is vastly reduced, providing peace of mind for all users and contributing to a safer home environment.
Increased Property Value
How to build a walk in shower? A well-designed walk-in shower can increase home value. They are a sought-after feature in real estate markets, appealing to a broad buyer demographic.
Overall, walk-in showers merge functionality with style, making them a worthwhile investment for both comfort and home valuation. When considering your bathroom remodeling, weigh these benefits to determine if a walk-in shower aligns with your needs and preferences.
Assessing Your Space and Bathroom Layout
When considering a walk-in shower installation, the first step is assessing your space. This ensures the design fits well within your current bathroom layout. Here is what you need to focus on:
Understand Your Bathroom’s Dimensions
Begin by measuring your bathroom’s length, width, and height. Properly note down the dimensions. This helps in designing a shower that fits perfectly in the available space.
Evaluate the Current Layout
Examine existing features, such as your vanity, toilet, and any built-ins. Plan your walk-in shower around these elements to maintain functionality and flow.
Consider Plumbing and Electrical Systems
Check the locations of your current plumbing and electrical systems. For a cost-effective installation, align your new shower with these points. Knowing this will largely influence the shower design.
Identify Potential Changes
Determine whether you need to move fixtures or make structural changes. These modifications can affect your overall budget and installation process.
Analyze Accessibility Needs
Think about who will use the shower. How to build a walk in shower?Plan for low or no threshold options if users need easier access. This planning helps in creating a safe and comfortable space.
Decide on a Walk-In Shower Placement
Choose a corner or side wall for your walk-in shower. This decision depends on your preference and where it fits best within the layout.
By carefully assessing each element, you establish a solid foundation for your walk-in shower. How to build a walk in shower?It ensures that functionality pairs with aesthetic appeal. This crucial step lays the groundwork for the entire installation project.
Walk-In Shower Design Considerations
Designing a walk-in shower demands thoughtful consideration to combine style and function. Keep these factors in mind when planning your design:
- Space Optimization: Work with the area you have. Small bathrooms benefit from minimalistic designs. Larger spaces offer more layout options.
- Shower Placement: Choose a location that complements the existing bathroom layout. Corners can save space, while a central placement can serve as a focal point.
- Privacy Concerns: Glass walls add openness but consider frosted or tinted options for more privacy.
- Accessibility Features: Include grab bars, benches, and low thresholds for safety and comfort, especially if mobility is a concern.
- Lighting: Good lighting prevents accidents and enhances the shower experience. Consider built-in LED lights or nearby fixtures.
- Ventilation: Proper ventilation prevents mold growth and keeps the area dry. Plan for an exhaust fan or a window in your design.
- Doorless Entry: Evaluate whether a doorless design fits your lifestyle. It offers ease of access but may affect privacy and temperature control.
- Personalization: Incorporate niches, shelves, or unique tile patterns to make the space truly yours.
- Future Resale: Think about potential buyers. A universally appealing design might make your home easier to sell later on.
Aligning these design considerations with your needs ensures a walk-in shower that is both a daily joy and a wise investment.
Material Selection for Your Walk-In Shower
How to build a walk in shower? Choosing the right materials for your walk-in shower is essential. It impacts the look, feel, and longevity of your new shower. Focus on walls, floors, and fixtures when picking materials.
Walls and Floors
Walls and floors set the stage for your shower’s design. Go for tiles for a classic look or acrylic for low maintenance. Seal every wall with a waterproof layer to prevent leaks.
- Tiles: Ceramic or porcelain are great for a durable finish. Stone tiles like marble add luxury but need more care.
- Acrylic Panels: A more budget-friendly choice. These come in various colors and sizes and are easy to clean.
- Other Options: Consider fiberglass or solid surface materials for different looks and durability levels.
Shower Base
The base should match your style and needs. Prefabricated pans are quicker to install. Custom bases allow more design freedom but require professional fitting.
- Prefabricated Pans: Often made of acrylic or fiberglass. These are ready to install and come in standard sizes.
- Custom Bases: Tiled or stone bases tailored to your space. Ensure they have proper slope for water drainage.
Fixtures
Fixtures add functionality to your shower. Showerheads, faucets, and handles should be easy to use and match your bathroom’s style.
- Showerheads: Rainfall, handheld, or multi-jet for different experiences. Pick what fits your daily routine.
- Valves and Controls: Install thermostatic or pressure-balanced valves for safe and consistent water temperature.
- Storage and Seating: Include shelves or a built-in bench for comfort and convenience.
Picking the right materials will lead to a shower that’s not only satisfying to use but also easy to maintain and clean. Plan wisely to enjoy your walk-in shower for years to come.
The Installation Process Step-by-Step
Navigating through the installation process of a walk-in shower can be intricate. However, with a step-by-step guide, the complexity becomes manageable. Let’s delve into the essential phases to bring your walk-in shower to life.
Initial Preparations
Before diving into the build, preparation is key. How to build a walk in shower? Clear out existing fixtures and examine the space where your new shower will reside. Double-check that plumbing and electrical systems align with your plan.
Laying the Foundation
Onto the framework. Construct sturdy walls and a solid base to support your shower. Ensure all surfaces have an effective waterproofing membrane to prevent possible leaks.
Shower Base Installation
Choosing the right shower base is crucial. Whether prefab or custom, the base must be leveled properly. Secure it firmly in place, ensuring smooth drainage.
Wall Construction and Waterproofing
Build up your shower walls with materials like cement board or waterproof drywall. Apply a comprehensive waterproof seal to safeguard against moisture.
Flooring and Tiling
When it comes to floors and tiles, select materials that blend function with style. Install them with care, focusing on a seamless and secure arrangement.
Adding the Fixtures
Install the fixtures—showerheads, faucets, and controls. Opt for designs that complement the rest of your bathroom while promising endurance and ease of use.
Finishing Touches
Now’s the moment for final touch-ups. Review every component, from tiles to taps, ensuring everything is in place and functioning as it should.
The Final Review
Before declaring the project complete, run a thorough check. Watch for leaks, test the temperature controls, and adjust any fittings if necessary.
Each phase in the installation process holds its importance, carving out the path to a fully functional and stylish walk-in shower. Attention to detail and proper execution are pivotal, transforming your bathroom into a modern retreat.
Choosing the Right Shower Base
Choosing the right shower base is critical for a successful walk-in shower installation. This base will determine the overall look, feel, and functionality of your shower. Here are several factors to consider when selecting your shower base:
- Material Choice: Acrylic and fiberglass are popular materials for prefabricated bases due to their durability and ease of installation. For a custom look, consider tiled or stone bases.
- Size and Shape: Make sure the dimensions of the base fit well within your bathroom layout. Also, decide between a rectangular, square, or neo-angle base to best utilize your space.
- Threshold Height: If accessibility is a concern, opt for a low or no threshold base. This choice aids in reducing the risk of trips and falls.
- Drain Location: The position of the drain affects the design and slope of the base. Ensure it aligns with your bathroom’s plumbing for a smooth water flow.
- Slip Resistance: Safety is a priority, so look for a base with a textured surface to prevent slips. Some materials come with built-in slip-resistant patterns.
- Ease of Cleaning: A good shower base should be easy to maintain. Look for options with non-porous surfaces that resist mold and mildew.
While prefabricated shower pans are convenient, a custom-tiled base allows for greater design flexibility. Always ensure the selected base provides reliable waterproofing and efficient drainage to maintain a clean and safe walk-in shower.
Final Inspection and Post-Installation Cleanup
After you install your walk-in shower, doing a final inspection is key. This step ensures everything is in place and working well. Here’s what you’ll need to focus on:
Check All Connections and Seals
Look at all the water connections to make sure there are no leaks. Confirm that all seals around the shower base and doors are tight and waterproof.
Test the Shower Functionality
Turn on the shower to test the water flow and temperature controls. Make sure the shower drains correctly and there are no clogs.
Clean the Area
Clear any debris from the installation process. Wipe down tiles and surfaces to remove dust or grime.
Final Walk-Through
Do a last check to see that all the fixtures are installed properly and the area is ready for use.
Ready for Use
Once you’ve done these checks and cleaned up, your new walk-in shower is ready to enjoy.
A proper final inspection and cleanup help catch any issues before they become big problems. They ensure your walk-in shower is safe, fully functional, and looks great. Always check each part carefully and clean up well after the work is done. This care will help your shower stay nice for years to come.
Maintenance and Care Tips for Walk-In Showers
Taking care of your walk-in shower ensures its durability and preserves its sleek look. Here are practical tips for maintaining your shower:
- Regular Cleaning: Wipe down your shower after each use to prevent soap scum and limescale. Use a squeegee on glass surfaces for a streak-free finish.
- Tackle Mold Early: Keep an eye out for mold spots. Treat them promptly with a mixture of water and vinegar or a suitable mold remover.
- Sealant Checks: Inspect the sealant around the shower base and doors regularly. Repair any cracks to keep the shower watertight.
- Ventilation is Key: Always use an exhaust fan or open a window after showering. This practice reduces moisture and deters mold growth.
- Soft Cleaning Materials: Use soft cloths or sponges to clean surfaces. Avoid abrasive tools that can scratch or damage the materials.
- Check Drains: Keep the drain free of hair and debris to prevent clogs. A strainer can help catch solids before they enter the drain.
- Periodic Deep Clean: Set aside time for a monthly deep clean. Pay attention to grout lines and crevices that might harbor dirt or mildew.
- Product Selection: Choose cleaning products designed for your shower’s materials. Incorrect products might cause harm or dull the surfaces over time.
- Professional Assistance: Consider an annual inspection by a professional. They can handle any complex issues and offer advice on long-term care.
Implementing these care tips will keep your walk-in shower in top condition. Regular maintenance not only extends the life of your shower but also enhances your daily bathing experience.
Resources and Additional Guidance
To complete your walk-in shower project successfully, you may need additional guidance. Here are some helpful resources:
- Consult Professionals: It’s wise to seek advice from experts. Consider hiring a bathroom designer or a plumber for technical aspects.
- Online Tutorials: Search for online videos and tutorials. They can give step-by-step guides for various tasks.
- Home Improvement Books: Find books with detailed walkthroughs on bathroom renovations. They often include tips on choosing materials and layouts.
- Building Supply Stores: Staff at these stores can provide advice on materials and tools. They sometimes offer workshops.
- Community Forums: Join online forums or social media groups focused on home improvement. They’re good for quick tips and peer support.
- Government Building Codes: Check local codes for construction standards. This ensures your walk-in shower meets all regulations.
Remember to use all resources at your disposal to enhance your knowledge and confidence in undertaking a walk-in shower installation. These resources can save time, improve quality, and help avoid common pitfalls.


