Introduction
Changing shower fixtures might seem like a daunting task, but with the right tools and guidance, it can be a straightforward DIY project. Whether you want to update the look of your bathroom, improve water efficiency, or fix a leaky faucet, how to change shower fixtures is an effective way to achieve your goals. This guide will walk you through each step of the process, from selecting new fixtures to installing them correctly.
Understanding Shower Fixtures
Before diving into the replacement process, it’s essential to understand the various types of shower fixtures available. How to change shower fixtures? Knowing the differences will help you make informed decisions about which fixtures best suit your needs.
Types of Shower Fixtures
Shower fixtures generally include the showerhead, the valve, and the handle. Each component has different styles and functions:
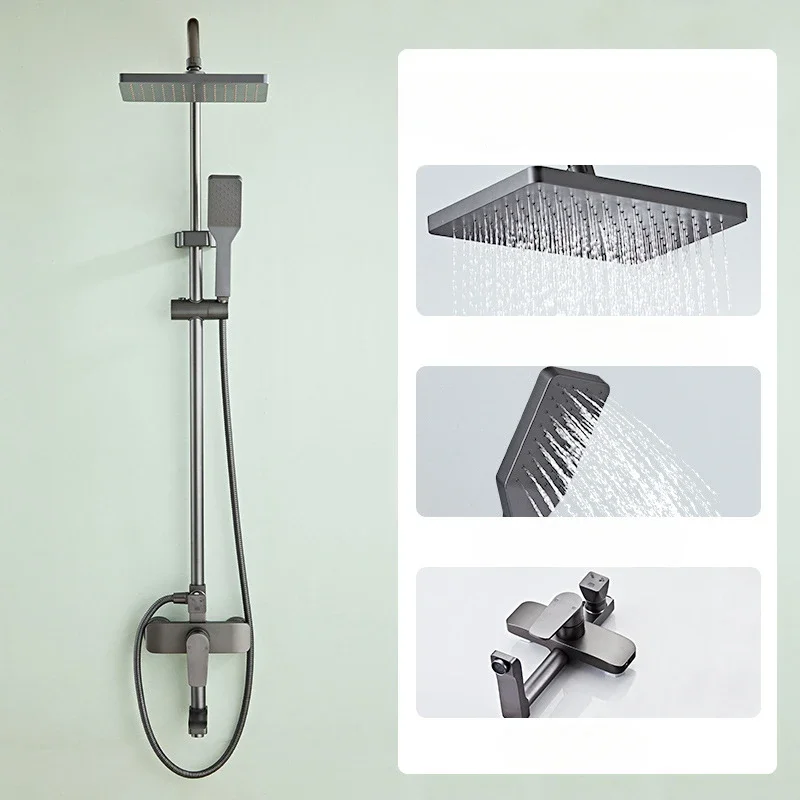
- Showerhead: This part delivers water to you while you shower. Showerheads come in various designs, including handheld, rain, multi-function, and fixed. A handheld showerhead offers flexibility, while a rain showerhead provides a luxurious experience with broad water coverage.
- Valve: The valve controls the flow and temperature of the water. It is usually hidden behind the wall. Some common types include single-handle and dual-handle valves. Single-handle valves allow you to control both temperature and flow with one lever, while dual-handle valves separate temperature and flow controls.
- Handle: The handle is the part you use to adjust the water. Handles can be found in various designs, such as lever, knob, or cross-style. The choice of handle design impacts both functionality and aesthetics.
Selecting New Shower Fixtures
Choosing new shower fixtures involves more than just picking the most attractive design. You need to consider compatibility with your existing plumbing, the type of water pressure in your home, and the overall style of your bathroom.
Compatibility with Existing Plumbing
Before purchasing new fixtures, check the compatibility with your existing plumbing. The configuration of your current setup will determine which fixtures will work. Most showers use a standard 1/2-inch pipe, but there can be variations. Measure the distance between the mounting holes and the pipe’s size to ensure the new fixtures will fit properly.
Water Pressure Considerations
The water pressure in your home affects how well your shower fixtures perform. Low water pressure might require a showerhead designed for better flow, while high pressure might necessitate a pressure-compensating showerhead to prevent excessive splashing. Check your water pressure and select fixtures that match your needs.
Bathroom Style and Design
Your new fixtures should complement the overall style of your bathroom. Whether your bathroom has a modern, traditional, or minimalist design, there are fixtures available to match. Choose finishes like chrome, brushed nickel, or oil-rubbed bronze to coordinate with other elements in your bathroom.
Tools and Materials Needed
Having the right tools and materials is crucial for a successful fixture replacement. Make sure you have everything you need before starting the project.
Essential Tools
- Adjustable Wrench: This tool is necessary for loosening and tightening nuts and bolts.
- Pipe Wrench: A pipe wrench provides a firm grip on pipes and fittings, making it easier to remove or install them.
- Screwdriver Set: You’ll need both flathead and Phillips head screwdrivers for removing and securing screws.
- Plumber’s Tape: Also known as Teflon tape, this helps create a watertight seal on threaded connections.
Materials Required
- New Shower Fixtures: Ensure you have all components of the new fixtures, including the showerhead, valve, and handle.
- Sealant: Use plumber’s putty or silicone sealant to prevent leaks around the fixtures.
- Replacement Parts: Keep any additional parts or fittings that might be needed, such as escutcheon plates or adapter kits.
Removing Old Shower Fixtures
How to change shower fixtures? Before installing new fixtures, you need to remove the old ones. This process requires some basic plumbing skills and careful handling to avoid damaging your plumbing.
Turning Off the Water Supply
Start by turning off the water supply to your shower. Locate the shut-off valves, usually found in a nearby closet or basement, and turn them clockwise to close. Open the shower faucet to drain any remaining water in the pipes.
Removing the Showerhead
Use an adjustable wrench to unscrew the showerhead from the pipe. Turn the wrench counterclockwise to loosen it. Once removed, clean the threads of the pipe to remove any old plumber’s tape or debris.
Detaching the Handle and Valve
Next, remove the handle by unscrewing it from the valve. Depending on the design, you might need a screwdriver or Allen wrench. Once the handle is removed, you can access the valve. Unscrew the valve from the pipe or wall, carefully detaching it from any connections.
Cleaning and Preparing the Area
After removing the old fixtures, clean the area thoroughly. Remove any leftover sealant or plumber’s tape from the pipe threads and inspect the area for any damage. Repair or replace any damaged parts before installing the new fixtures.
Installing New Shower Fixtures
With the old fixtures removed and the area prepared, you can now install the new fixtures. Follow these steps to ensure a proper installation.
Installing the New Valve
Begin by installing the new valve. If the new valve is not an exact match for the old one, you may need to use an adapter. Apply plumber’s tape to the threads of the valve and screw it into place. Tighten it securely with a pipe wrench.
Attaching the New Handle
Once the valve is installed, attach the new handle. Align it with the valve and secure it with screws. Ensure the handle operates smoothly and adjusts the water flow and temperature correctly.
Installing the New Showerhead
Screw the new showerhead onto the pipe. Hand-tighten it first, and then use an adjustable wrench to ensure it is secure. Be careful not to overtighten, as this can damage the threads or pipe.
Sealing and Testing
Apply plumber’s tape or sealant to any threaded connections to prevent leaks. Turn on the water supply and test the new fixtures for proper operation. Check for any leaks around the connections and tighten any fittings as necessary.
Troubleshooting Common Issues
During or after installation, you might encounter some common issues. Knowing how to address these problems can save you time and prevent potential damage.
Leaks Around the Fixtures
If you notice leaks, check the connections for proper sealing. Ensure that plumber’s tape or sealant is applied correctly and that all fittings are tightened. If the leak persists, disassemble the fixture and reapply tape or sealant.
Low Water Pressure
Low water pressure can result from a clogged showerhead or an issue with the valve. Remove the showerhead and clean any mineral deposits or debris. If the problem continues, inspect the valve for any blockages or malfunctions.
Handle Operation Problems
If the handle is difficult to turn or doesn’t operate smoothly, it might be improperly aligned or installed. Check the handle and valve connections to ensure they are correctly aligned and secure. Adjust as needed for smooth operation.
Final Thoughts
How to change shower fixtures? Changing shower fixtures can significantly improve the functionality and appearance of your bathroom. By following the steps outlined in this guide, you can successfully replace old fixtures with new ones. Remember to choose fixtures that match your style, ensure compatibility with existing plumbing, and use proper installation techniques. With careful planning and execution, you can enjoy a refreshed shower experience and enhanced bathroom aesthetics.


