Signs It’s Time to Replace Your Shower Faucet
How to change a shower faucet? Recognizing when to change a shower faucet is key to bathroom maintenance. Look out for these clear signs that suggest a replacement is due.
- Persistent Dripping: If your faucet drips even after fully closing it, the seals might be worn out.
- Difficulty in Operation: When turning the faucet on or off requires extra effort, the internal parts could be corroded or damaged.
- Visible Corrosion: Rust or mineral deposits on the faucet body or spout are a bad sign.
- Noise Issues: Strange sounds from the faucet can indicate a pressure problem or worn components.
- Inconsistent Water Flow: A decrease in water pressure or erratic water flow often means a fault in the faucet mechanism.
- Leakage Around the Handle: Water spots or leaks near the handle suggest failed gaskets or O-rings.
Address these issues promptly. Delay can lead to bigger problems, like water damage or increased utility bills.
Tools and Materials You Will Need
Before you start the process of how to change a shower faucet, gather the necessary tools and materials. This preparation makes the job smoother and prevents any mid-task interruptions. Here’s what you’ll need:
- Adjustable Wrench: To loosen and tighten the nuts and connections.
- Screwdrivers: Both Phillips and flat-head types depending on your faucet’s screws.
- Plumber’s Tape: This helps to create watertight seals on threaded connections.
- Allen Wrenches: Some faucet handles are attached with hexagonal set screws requiring an Allen wrench.
- Plumbing Grease: To lubricate any new components and o-rings during installation.
- Replacement Parts: Ensure you have the correct faucet model or replacement part that matches your plumbing.
- Sealant: A silicone or plumber’s putty to seal gaps and prevent leaks.
- Rags and Towels: For cleaning up and drying the work area or stopping minor leaks during the change.
- Bucket: To catch any residual water when disassembling the old faucet.
- Teflon Tape: Also known as thread seal tape, for securing connections.
Double-check you have all items before starting. This will ensure a smooth process when following the steps on how to change a shower faucet. Missing tools or materials can cause delays and may even lead to a poorly done job.
Step-by-Step Guide to Removing the Old Faucet
To replace your shower faucet smoothly, follow these steps. This guide is simple and clear, making the task seem effortless.
- Turn Off Water Supply: Ensure no water flows while you work. Find the main valve and shut it off.
- Protect Shower Area: Prevent damage by laying rags or towels in the bathtub or shower floor.
- Remove Faucet Handle: Use a screwdriver or Allen wrench to take off the handle. Some models hide screws under caps that you have to pry open.
- Detach Trim Plate: It may need gentle prying or unscrewing to come off. This exposes the workings inside.
- Unscrew the Valve Locknut: An adjustable wrench will loosen and remove this. Be cautious to prevent pipe twisting.
- Take Out the Old Valve: Pull out the valve. You may need some force if it’s stuck due to mineral deposits.
- Clean Valve Area: Wipe away debris, rust, or old sealant from the area where the new faucet will fit.
Remember, the ‘how to change a shower faucet’ process requires careful handling. Rough force can damage your plumbing. Gather all your tools and follow these steps to avoid any mishaps. Take your time and you’ll have the old faucet out in no time.
Selecting the Right Replacement Faucet
Selecting the right replacement shower faucet ensures performance and avoids future issues. Here’s what to consider:
- Compatibility: Check your shower’s setup. Make sure the new faucet fits your existing configuration.
- Style and Finish: Choose a style that matches your bathroom’s decor. Decide on a finish that resists tarnishing and corrosion.
- Features: Think about features like water-saving, temperature control, and easy-clean nozzles.
- Quality: Invest in a faucet with a reputation for durability. Look for warranties or guarantees.
- Ease of Installation: Prefer faucets known for easy installation. This can save you time and hassle.
Review your bathroom layout and plumbing before you buy. A good match means fewer adjustments during installation. Remember to read reviews and check ratings. Real-world feedback often helps in making a final decision. Stick to your budget but don’t compromise on quality. A durable, functional, and attractive faucet is worth the investment. Lastly, consider the ‘how to change a shower faucet’ steps and ensure you’re comfortable with the process.
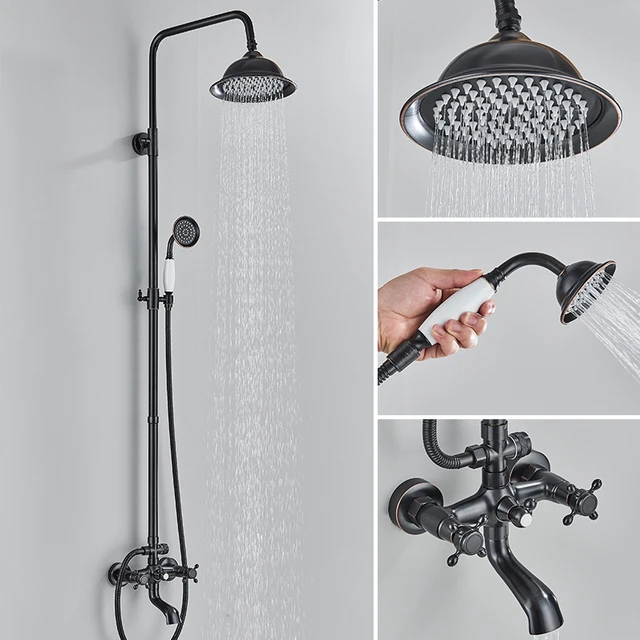
Installation Process for the New Shower Faucet
After selecting the appropriate replacement, it’s time to install the new shower faucet. This critical step should be approached with care to ensure a leak-free installation and optimal performance. Here’s a simplified guide for the installation process.
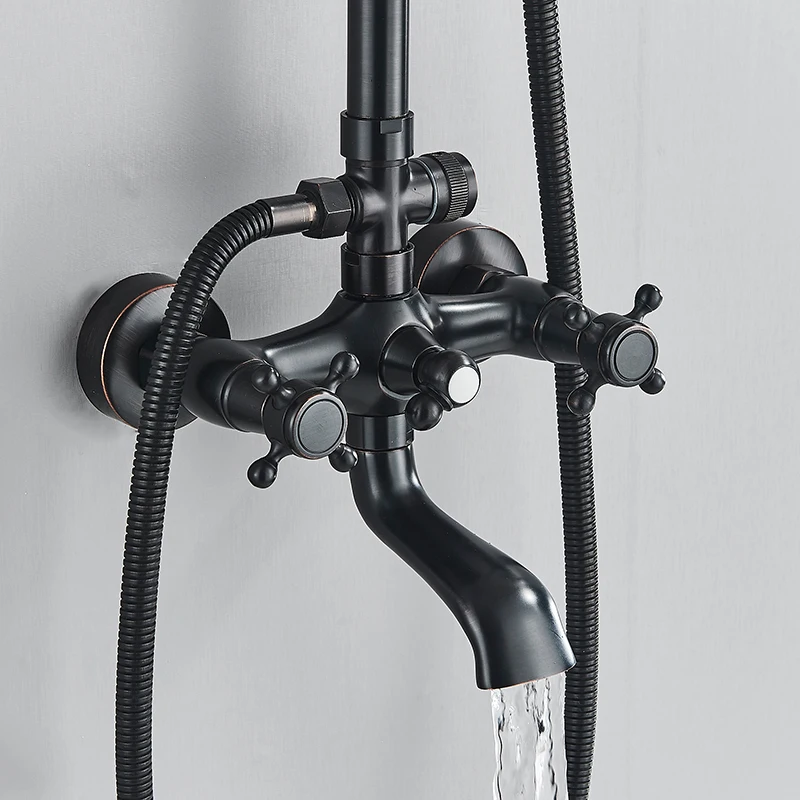
- Prep the Valve Body: Apply plumber’s tape on the threads of the valve body for a watertight seal.
- Install the Valve: Position the new valve into place, ensuring it’s aligned correctly. Use the adjustable wrench to secure it.
- Attach the Trim Plate: Place the trim plate over the valve and secure it with screws. Ensure it’s flush and sealed.
- Install the Handle: Apply plumbing grease on new o-rings and set the handle in place. Tighten with a screwdriver or Allen wrench.
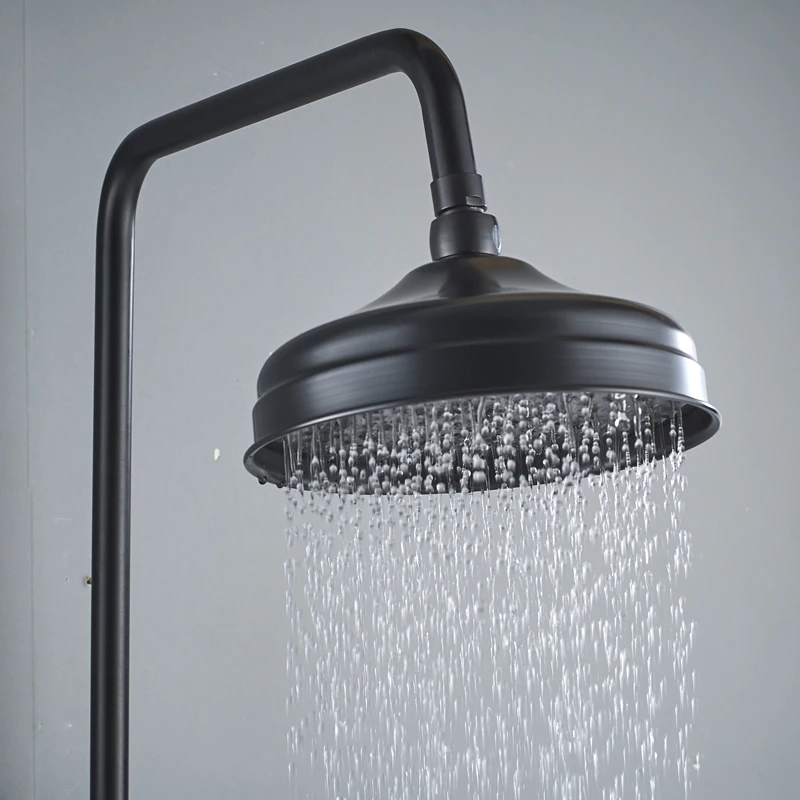
- Secure Shower Head and Spout: Wrap Teflon tape around these connections, then attach and tighten them.
- Apply Sealant: Use silicone or plumber’s putty as needed around the edges to prevent water seepage.
Double-check all connections are tight but be gentle to prevent damaging the fittings. With the new faucet installed, you’re now ready to test your work. Remember, taking your time during the ‘how to change a shower faucet’ steps can save you from potential issues later on.
Common Mistakes to Avoid When Replacing a Shower Faucet
When tackling how to change a shower faucet, certain pitfalls can make the job harder. Avoid these common mistakes to ensure a smooth installation:
- Skipping the Manual: Always read the manufacturer’s instructions before beginning. Every faucet model is different.
- Ignoring Safety Protocols: Never start without turning off the water supply. This prevents unwanted water damage.
- Forgetting to Check Compatibility: Before purchasing, make sure the new faucet fits your shower’s setup.
- Over-tightening Fittings: This can strip threads or crack the material. Tighten just enough to seal.
- Neglecting Sealant: Always use plumber’s tape or putty to prevent leaks around connections.
- Improper Tools Usage: Use the right size and type of tools to avoid damaging parts.
- Lack of Cleaning: Clean all valve areas before installing the new faucet. Debris can cause leaks.
- Rushing the Process: Take your time. Rushing can lead to mistakes and more time fixing them.
By sidestepping these errors, your ‘how to change a shower faucet’ project will go smoothly. Good prep and careful work are keys to success. Keep your workspace organized and double-check each step as you work. A well-done installation will save you time and money in the long run.
Testing Your New Shower Faucet Installation
After installing your new shower faucet, it’s crucial to test its functionality. Follow these steps to ensure everything works correctly.
- Turn On Water Supply: Carefully open the main valve to allow water flow.
- Check For Leaks: Inspect all connections for any drips or moisture. Dry areas hint at good seals.
- Operate the Faucet: Turn the handle and watch for smooth operation. It should move easily.
- Evaluate Water Flow: Let the water run and check for consistent flow and temperature control.
- Confirm Drainage: Ensure water drains properly. Slow drainage can signal other issues.
- Listen for Noise: No peculiar sounds should come from the faucet. Odd noises may signal a problem.
If issues arise during testing, recheck connections and installation steps. Sometimes, a slight adjustment can fix a leak or flow problem. Once testing confirms a successful installation, you can enjoy your new shower faucet’s performance.
Maintenance Tips to Prolong Your Shower Faucet’s Life
Maintaining a shower faucet can extend its life and prevent costly repairs. Follow these simple tips:
- Regular Cleaning: Wipe down the faucet weekly to prevent buildup of soap scum and mineral deposits.
- Inspect Seals: Check seals and O-rings periodically for wear. Replace them if needed to avoid leaks.
- Handle with Care: Gently turn the faucet on and off. Avoid force that can wear out parts faster.
- Soft Water: If you have hard water, consider installing a water softener. Soft water reduces mineral buildup in your faucet.
- Adequate Drainage: Ensure your shower drains properly. Standing water can corrode the faucet over time.
- Use of Mild Cleaners: Harsh chemicals can damage the faucet’s finish. Use mild detergents for cleaning.
- Professional Checks: Have a plumber inspect your bathroom plumbing annually for any hidden issues.
- Prompt Repairs: Fix drips or leaks right away. Small issues can turn into big problems if ignored.
By taking care of your shower faucet with these tips, you can make it last longer. These steps help protect your investment and ensure a pleasant shower experience. Keeping an eye on how your faucet performs can also inform you of when it may be time to replace it before serious problems occur. Remember, consistent upkeep is the best way to maximize your faucet’s longevity and function.


