Introduction
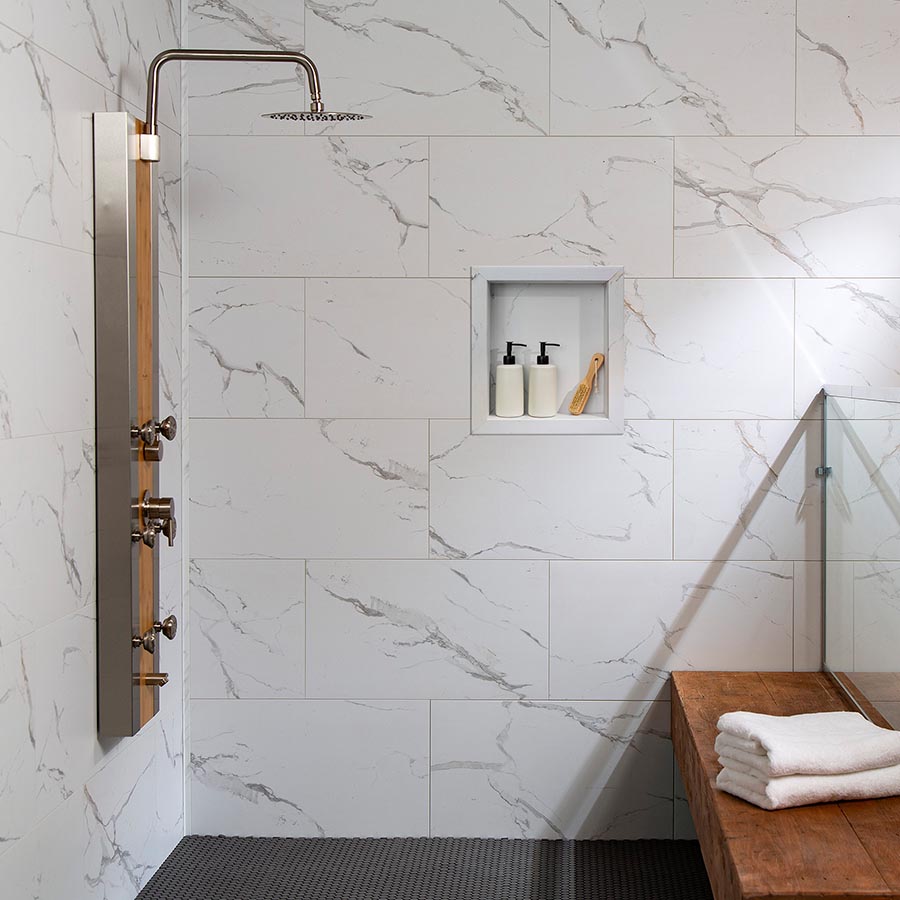
When it comes to bathroom renovations, adding a shower niche is an excellent way to combine functionality and aesthetics. A shower niche is a recessed area designed to hold toiletries within easy reach while keeping the shower organized. Tiling a shower niche can elevate the look of your bathroom and create a sleek, modern appearance. This article will guide you how to tile a shower niche, from gathering materials to finishing touches.
Step 1: Selecting the Right Trowel for Your Tile
Choosing the correct trowel is vital for tiling success. Start by considering your tile size. For mosaic tiles or smaller ceramic tiles up to four inches, a V-notched trowel works best. Its size ranges from 3/16 inch to 1/4 inch. If your tiles are between four to eight inches, go for a square-notched trowel. A 1/4 inch by 1/4 inch trowel is commonly recommended. Larger ceramic tiles, around eight to sixteen inches, also need a square-notched trowel. In this case, use one that’s 1/2 inch by 1/2 inch. For tiles that are sixteen inches or more, choose a 1/2 inch by 3/4 inch square-notched trowel.

Remember, the right trowel spreads thin-set evenly. This way, your tiles stick better. Also, avoid using mastic in wet areas like showers. It’s organic and does not bond as well as thin-set mortar. Stick with thin-set, especially one recommended for showers, to ensure a strong hold.
Step 2: Installing the Sill Tile
When tiling a shower niche, starting with the sill tile is crucial. The sill tile, also known as the bottom shelf, provides a base for the rest of the tiles. It’s important to choose a sill tile that matches or complements the main wall tiles for a seamless look. Here are the steps to install the sill tile effectively:
- Select the Right Sill Tile: Choose a tile that blends well with your shower’s overall design. Popular options include pieces of the main wall tile or materials like marble.
- Prepare the Surface: Ensure the niche is clean, free from debris and dust.
- Apply Thin-Set: Using the trowel selected in Step 1, spread an even layer of thin-set on the niche’s base.
- Back-Butter the Tile: Apply a thin layer of thin-set to the back of the sill tile for stronger adhesion.
- Set the Tile in Place: Position the sill tile onto the thin-set, pressing down firmly.
- Ensure Proper Slope: The sill should have a slight slope towards the shower to prevent water accumulation.
- Check Level: Use a laser level to ensure the sill tile is perfectly horizontal. This step is vital if you are installing multiple niches.
- Clean Excess Thin-Set: Wipe away any thin-set that oozes out from the edges, to maintain a clean look.
Through these steps, the sill tile will be set securely and ready to support the subsequent rows of tiles. This lays the groundwork for a beautifully tiled shower niche that adds both function and style to your bathroom.
Step 3: Application of Thin-Set on Niche Back Wall and Sill
Before you place any back wall tiles, the application of thin-set is key. It’s what binds the tiles to your shower niche firmly. Follow these instructions to get a good hold:
- Make the Thin-Set: Mix your thin-set mortar as per the manufacturer’s instructions. Aim for a mixture similar to peanut butter.
- Spread the Thin-Set: With your chosen trowel, spread the thin-set on the niche’s back wall. Ensure it’s an even coat with no bare spots.
- Check Thin-Set Ridgidness: The thin-set should hold its ridges without slumping. This shows it’s ready for tiles to be applied.
- Apply to Sill: Next, comb thin-set on the sill area too. Remember, the sill is where water will drain, so get it right.
- Look for Sagging: Thin-Set must not sag. If it does, your mixture might be too wet. Adjust as needed.
- Back-Butter Sill Tile: Apply thin-set to the sill tile’s back. This double application ensures a stronger bond.
- Place the Sill Tile: Now, set the sill tile onto the thin-set on your niche’s base.
- Create the Slope: Confirm the tile slopes slightly towards the shower area. It prevents water from pooling.
- Level the Sill: Use your laser level now. It’s crucial to have the sill tile level, especially for multiple niches.
- Clean as You Go: Any excess thin-set should be cleaned immediately for a neat appearance.
For a strong, flat, and impressively tiled shower niche, precise application of thin-set on the niche back wall and sill is essential. These steps help avoid water damage and mold, leading to a functional and visually appealing result.
Step 4: Embedding the Back Wall Tiles
Embedding the back wall tiles is a key step in creating a polished look for your shower niche. It’s essential to align and secure the tiles properly. Here’s how to proceed:
- Prepare the Tiles: Measure and cut your back wall tiles as needed. Ensure they fit nicely in the niche space.
- Apply Thin-Set: Spread a layer of thin-set on the back wall of the niche. Use your trowel at a 45-degree angle for even coverage.
- Press Tiles Firmly: Place each tile onto the thin-set. Press down gently to ensure good contact with the adhesive.
- Check for Evenness: Use a spirit level to confirm tiles are flat against the wall and even with each other.
- Set the Spacers: Place spacers between each tile to maintain uniform gaps for grouting.
- Remove Excess Adhesive: Clean any thin-set that seeps out from between the tiles. Do this before it dries.
- Adjust as Necessary: Make sure each tile is perfectly aligned with the others. Small adjustments can make a big difference.
- Ensure Vertical Alignment: Double-check tiles are straight using the laser level. This helps keep the niche tidy and symmetrical.
By carefully embedding your back wall tiles and ensuring each step is done right, you’ll have a solid foundation for your shower niche that looks professional and lasts long.

Step 5: Ensuring Level and Position with the Laser Level
Achieving a perfect level for your shower niche tiles is vital for both looks and function. Here’s what to do:
- Set Up the Laser Level: Position your laser level so it spans across the niche area.
- Check Sill Alignment: Confirm the sill tile is level. Adjust slightly if needed.
- Level the Back Wall Tiles: Shine the laser across the back wall tiles. Make sure they are even.
- Align Multiple Niches: If installing more than one niche, use the laser to line them up.
- Mark Reference Lines: Create horizontal and vertical lines on the surrounding surface as guides.
- Verify Side Tile Placement: Make sure each side tile is plumb and matches the laser’s line.
- Check for Consistency: Every tile position should match your reference lines for a uniform look.
- Make Adjustments: If any tile is off, gently slide it to meet the laser level’s guide.
Using a laser level simplifies achieving a consistently level and professional finish for your shower niche tiling.
Step 6: Fitting and Adjusting the Side Tiles
The next focus in tiling your shower niche is the side tiles. They are crucial for framing the space and supporting the overall structure. Here’s how you do it:
- Measure Precisely: Use a measuring tape for the side tiles. Check the height and width.
- Mix the Thin-Set: Prepare your thin-set mortar well. Aim for the right consistency.
- Apply Thin-Set to Sides: With the trowel, coat the side walls evenly.
- Cut Tiles if Needed: You may need to trim your side tiles for a perfect fit. Use tools like a wet saw or tile cutter.
- Back-Butter Tiles: Apply thin-set to the tile backs as well. This helps them stick better.
- Set Tiles in Place: Carefully position each side tile. Press them against the thin-set.
- Use Laser Level: For perfect alignment, employ a laser level. This ensures tiles are straight and even.
- Insert Spacers: Place spacers between tiles. This maintains equal gaps and supports even grouting.
- Check for Level: Always confirm tiles are level with the rest. Use the laser level here too.
- Adjust as Needed: Make any small shifts quickly. Aim for alignment with the rest of the niche.
- Clean Excess Mortar: Wipe away any thin-set oozing out. Keep the job site tidy.
Following these steps will ensure your side tiles are accurately placed and firmly secure. It sets the stage for successful completion of your shower niche tiling.
Step 7: Finishing Touches and Edge Treatments
The final stage in how to tile a shower niche involves the finishing touches and edge treatments. These steps are vital for both aesthetic appeal and functional longevity of your tiling work. Follow these instructions for a professional finish:
- Select Edge Treatments: Decide on how you will finish the edges. Caulk, decorative moldings, and metal transition strips are good options.
- Apply Caulk or Trim: If using caulk, apply a thin bead along the edges for a waterproof seal. For trims, measure and cut pieces to fit the niche perimeter.
- Install Trim Pieces: If you selected moldings or strips, set them in place using thin-set or a suitable adhesive. Make sure they align perfectly with your tiles.
- Check Alignment: Use your laser level again to verify that all trims or caulk lines are perfectly straight and level. Adjust as necessary.
- Clean Up: Remove any excess material or adhesive. Wipe down with a damp sponge for a clean, professional look.
- Inspect Your Work: Take a step back and review all tiles and trims. Ensure everything looks aligned and secure.
These steps should give your shower niche a beautiful, finished look and ensure it remains functional and durable.

Conclusion: Review and Final Inspections
Once you’ve completed the tiling of your shower niche, it’s essential to do a final review. This ensures all your hard work pays off by having a beautifully finished and structurally sound niche. Follow these simple steps for your final inspections:
- Check Tile Alignment: Look over tiles for any misalignments. Make necessary adjustments.
- Inspect Joints and Spacers: Ensure spacers are removed and joints are even.
- Review Edge Treatments: Examine edges for smoothness and correct finishing.
- Test for Firmness: Press gently on tiles to test their secureness.
- Evaluate Level and Slope: Use a laser level to check the overall level and slope towards the shower.
- Assess Aesthetics: Stand back and review the looks. All should appear clean and visually appealing.
- Confirm Waterproofing: Check caulking and seals to make sure they are water-tight.
- Clean the Area: Remove all tools and debris. Clean tiles with a damp sponge.
Your shower niche should now be a stunning feature of your bathroom that’s both practical and stylish. Remember, the detailed preparation and careful tiling you’ve completed help prevent water damage and mold. If you’re satisfied with the outcome, you can now rest easy and enjoy the new addition to your bathroom. If you’ve followed the steps and used your chosen materials well, the result will be a professional-quality finish! Remember to maintain your new tiled niche with regular cleaning to keep it looking great.


