Step 1: Diagnose the Problem
How to fix leaky shower head? When your shower head starts leaking, it’s crucial to find where the leak is coming from. A leak can lead to higher water bills and damage your bathroom. Here are steps to locate the source of the problem and identify common causes.
Identifying the Source of the Leak
To identify where your shower head is leaking, inspect it when the water is off. Look for drips coming from the shower head or where it connects to the wall. If water is leaking when the shower is on, the issue may be with the connections or the hose itself.
Start with dry tiles and a wiped-down shower. Turn the shower on and off, then watch for drips. Mark any leak points with a piece of tape. A steady leak from the shower head could mean a worn-out washer. If the shower arm or hose is leaking, it could be a loose connection.
Common Causes of Leaky Shower Heads
Leaky shower heads often result from failing parts or mineral buildup. Here are common problems to look for:
- Worn-out washers or O-rings: These parts seal connections but can decay over time.
- Corroded parts: Hard water can corrode your shower head, causing leaks.
- High water pressure: Too much pressure can damage the shower head and its parts.
- Improper installation: If the shower head wasn’t installed right, it might leak.
Check these areas first. If you find a worn washer or notice mineral deposits, note that these can be fixed easily. If you suspect high water pressure is the problem, you may need to install a pressure regulator. Looking for signs of improper installation can be tricky, and might require professional help.
Step 2: Gather Necessary Tools and Materials
Before beginning the repair, you must gather all the necessary tools and materials. Having these ready will save time and help ensure a smooth repair process.
Basic Tools for Shower Head Repair
To fix a leaky shower head, you’ll need a few basic tools. A wrench or pliers can help remove the shower head. You might also need a screwdriver to open any compartments. Keep a towel nearby to clean up any spills.
For sealing threads, Teflon tape is essential. A small brush or toothbrush is handy for cleaning parts. It’s also good to have a cloth to protect fixtures while using tools.
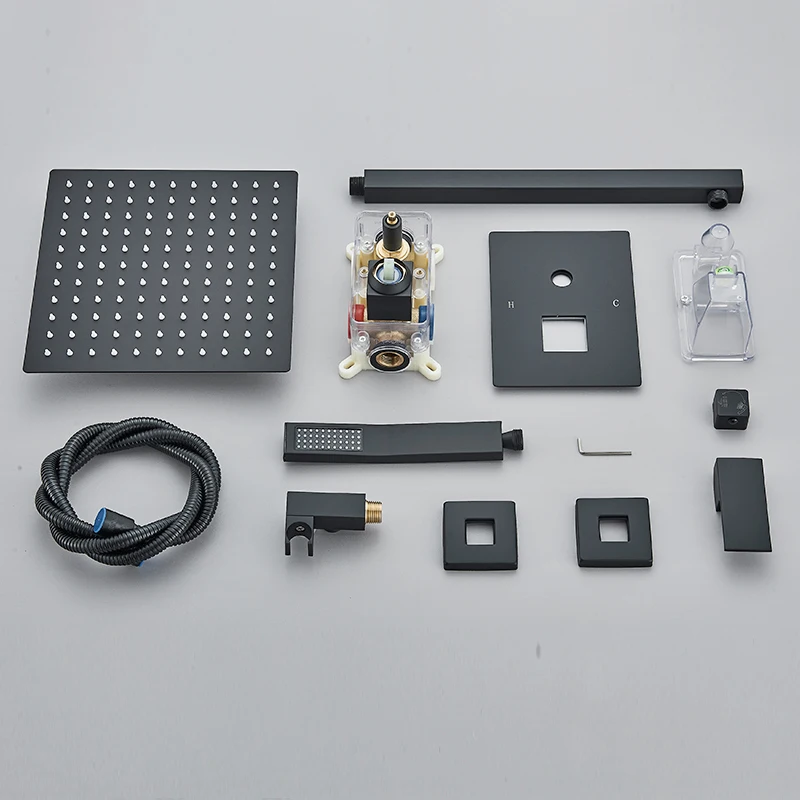
Replacement Parts You Might Need
Check your shower head for worn parts. You might need new washers or O-rings for seals. If the shower head itself is damaged, consider a replacement. Look at the connections and consider if new seals are needed there too.
Keep a list of the sizes and types of parts you remove. Take old parts with you when shopping for replacements to ensure a match. If your shower has a specific brand, check for brand-specific parts.
Step 3: Disassembly and Cleaning
How to Safely Remove Your Shower Head
To start repairing your leaky shower head, first turn off the water supply. This prevents any accidental water flow. Use a wrench or pliers to loosen the shower head. Wrap a cloth around the fixture to protect it. Gently twist the shower head counterclockwise until it comes off.
Make sure to keep all parts, like rubber washers and O-rings, safe. You will inspect these for damage later. Some shower heads might have screws. Use a screwdriver to remove them before taking the head off.
Cleaning and Removing Mineral Deposits
Once removed, check the shower head for mineral buildup. This is common in areas with hard water. Soak the shower head in white vinegar for several hours. This loosens the deposits.
After soaking, use a small brush, like an old toothbrush, to scrub the nozzles. This clears any remaining gunk. Rinse the shower head with water after cleaning. If mineral deposits are severe, soaking might take longer, or a second round of cleaning may be needed.
Before reassembly, ensure all parts are dry and clean. This step is crucial in preventing future leaks and clogs.
Step 4: Replace Damaged Components
Often, a leaky shower head issue stems from worn-out components that need replacing.
Changing Rubber Washers and O-Rings
To stop leaks, change any damaged rubber washers or O-rings. Dismantle the shower head, and look for these small, circular parts. If they’re worn or brittle, fit new ones. Matching the size exactly is essential. Replacements are available at hardware stores.
Dealing with Valve Issues and When to Replace Them
Leaking may also be due to valve problems. If adjusting the washer doesn’t fix the leak, inspect the valve. It’s found inside the shower head or handle, for single-faucet showers. Double-faucet showers have the valve in the faucet itself. Replace if it shows any sign of damage or corrosion.
Step 5: Reassembly and Testing
After replacing any necessary parts, it’s time to put your shower head back together.
Steps to Properly Reattach the Shower Head
Follow these steps to securely reattach your shower head:
- Wrap threads with Teflon tape: Apply new Teflon tape clockwise on the threads to prevent future leaks.
- Reattach the shower head: Carefully screw the shower head back on, turning it clockwise by hand at first.
- Tighten with a wrench: Use a wrench for final tightening, ensuring not to over-tighten which can damage threads.
Make sure to align parts properly to avoid cross-threading. Now, you’re ready for the leak check.
Checking for Leaks Post-Repair
Once you have your shower head attached, run the following checks:
- Turn on the water supply: Slowly turn on water and observe the shower head and connection points.
- Look for drips: Pay close attention to see if any water leaks from the shower head or the joints.
- Test different settings: If your shower head has multiple settings, test each one for leaks.
If your shower head still leaks after these steps, you may need to retighten connections or replace other components. Checking the shower arm for damage is also a good idea. If the leakage continues, consider seeking professional help.
Understanding Shower Valves
When dealing with a leaky shower head, it’s crucial to understand shower valves.
Different Types of Shower Valves and Their Functions
Shower valves control water flow and temperature in your shower. There are multiple types of shower valves, each with a specific function.
- Pressure Balancing Valve: This valve maintains a consistent water temperature even when other water sources are in use.
- Thermostatic Mixing Valve: It lets you set a desired temperature, which it then keeps stable throughout your shower.
- Diverter Valve: It directs water between the shower head, tub faucet, or hand shower.
- Transfer Valve: Similar to a diverter, but allows running multiple shower components at once.
Each type plays a key role in ensuring a comfortable shower experience. Knowing which type you have can help diagnose problems. For instance, a pressure balancing valve might fail to compensate for pressure changes, leading to a leak. In contrast, a worn diverter valve might cause water to drip from the shower head.
When to Call a Professional Plumber
Sometimes, fixing a leaky shower head needs more than a DIY approach. Knowing when to call a plumber can save you from bigger problems. Look for these signs that you need professional help.
Indications That You Need Expert Assistance
Here are clues you should call a pro:
- If leaks persist after you’ve tried fixing them.
- When you spot water damage on walls or ceilings.
- If mold develops quickly around the shower area.
- When you can’t identify the leak’s source.
- If you’re dealing with broken or corrosion-damaged pipes.
- When the shower’s valve system fails repeatedly.
Don’t wait too long to call a plumber if you see these signs. Quick action can prevent costly damages.
The Risks of DIY Plumbing
DIY repairs have risks, especially without the right skills. Here are some risks:
- You might cause more damage trying to fix the leak.
- Using the wrong tools can ruin pipes and fixtures.
- Improper repairs might lead to bigger leaks.
- You could void your home insurance or warranties.
- Some plumbing work may not meet legal codes.
For these reasons, it’s often safer to trust a professional plumber. They have the right tools and know-how to do the job without causing extra problems.
Preventative Measures and Maintenance
Engaging in regular maintenance can prevent future leaks. Simple tasks can keep a shower head functional for years.
Tips to Avoid Future Leaks
- Regular inspections help spot early signs of wear and possible leaks. Check monthly.
- Use a water softener if you have hard water. It reduces mineral buildup inside the shower head.
- Replace washers and O-rings annually to maintain seals. This can stop leaks before they start.
- Maintain moderate water pressure to avoid stressing shower parts. Install a pressure regulator if needed.
Regular Cleaning and Upkeep Practices
- Clean your shower head with white vinegar every two to three months to dissolve mineral deposits.
- Tighten connections gently but firmly during cleaning to prevent looseness that can cause drips.
- Lubricate moving parts like swivel balls with silicone grease to ensure smooth operation.
- Flush the system by running hot water through the shower head after cleaning to clear out debris.
These simple steps can extend the life of your shower head and keep your bathroom free from annoying leaks.